Visual Regression Testing
Vitest can run visual regression tests out of the box. It captures screenshots of your UI components and pages, then compares them against reference images to detect unintended visual changes.
Unlike functional tests that verify behavior, visual tests catch styling issues, layout shifts, and rendering problems that might otherwise go unnoticed without thorough manual testing.
Why Visual Regression Testing?
Visual bugs don’t throw errors, they just look wrong. That’s where visual testing comes in.
- That button still submits the form... but why is it hot pink now?
- The text fits perfectly... until someone views it on mobile
- Everything works great... except those two containers are out of viewport
- That careful CSS refactor works... but broke the layout on a page no one tests
Visual regression testing acts as a safety net for your UI, automatically catching these visual changes before they reach production.
Getting Started
Browser Rendering Differences
Visual regression tests are inherently unstable across different environments. Screenshots will look different on different machines because of:
- Font rendering (the big one. Windows, macOS, Linux, they all render text differently)
- GPU drivers and hardware acceleration
- Whether you're running headless or not
- Browser settings and versions
- ...and honestly, sometimes just the phase of the moon
That's why Vitest includes the browser and platform in screenshot names (like button-chromium-darwin.png).
For stable tests, use the same environment everywhere. We strongly recommend cloud services like Microsoft Playwright Testing or Docker containers.
Visual regression testing in Vitest can be done through the toMatchScreenshot assertion:
import { expect, test } from 'vitest'
import { page } from '@vitest/browser/context'

test('hero section looks correct', async () => {
  // ...the rest of the test

  // capture and compare screenshot
  await expect(page.getByTestId('hero')).toMatchScreenshot('hero-section')
})
Creating References
When you run a visual test for the first time, Vitest creates a reference (also called baseline) screenshot and fails the test with the following error message:
expect(element).toMatchScreenshot()

No existing reference screenshot found; a new one was created. Review it before running tests again.

Reference screenshot:
  tests/__screenshots__/hero.test.ts/hero-section-chromium-darwin.png
This is normal. Check that the screenshot looks right, then run the test again. Vitest will now compare future runs against this baseline.
TIP
Reference screenshots live in __screenshots__ folders next to your tests. Don't forget to commit them!
Screenshot Organization
By default, screenshots are organized as:
.
├── __screenshots__
│   └── test-file.test.ts
│       ├── test-name-chromium-darwin.png
│       ├── test-name-firefox-linux.png
│       └── test-name-webkit-win32.png
└── test-file.test.ts
The naming convention includes:
- Test name: either the first argument of the
toMatchScreenshot()call, or automatically generated from the test's name. - Browser name:
chrome,chromium,firefoxorwebkit. - Platform:
aix,darwin,freebsd,linux,openbsd,sunos, orwin32.
This ensures screenshots from different environments don't overwrite each other.
Updating References
When you intentionally change your UI, you'll need to update the reference screenshots:
$ vitest --updateReview updated screenshots before committing to make sure changes are intentional.
Configuring Visual Tests
Global Configuration
Configure visual regression testing defaults in your Vitest config:
import { defineConfig } from 'vitest/config'

export default defineConfig({
  test: {
    browser: {
      expect: {
        toMatchScreenshot: {
          comparatorName: 'pixelmatch',
          comparatorOptions: {
            // 0-1, how different can colors be?
            threshold: 0.2,
            // 1% of pixels can differ
            allowedMismatchedPixelRatio: 0.01,
          },
        },
      },
    },
  },
})
Per-Test Configuration
Override global settings for specific tests:
await expect(element).toMatchScreenshot('button-hover', {
  comparatorName: 'pixelmatch',
  comparatorOptions: {
    // more lax comparison for text-heavy elements
    allowedMismatchedPixelRatio: 0.1,
  },
})
Best Practices
Test Specific Elements
Unless you explicitly want to test the whole page, prefer capturing specific components to reduce false positives:
// ❌ Captures entire page; prone to unrelated changes
await expect(page).toMatchScreenshot()

// ✅ Captures only the component under test
await expect(page.getByTestId('product-card')).toMatchScreenshot()
Handle Dynamic Content
Dynamic content like timestamps, user data, or random values will cause tests to fail. You can either mock the sources of dynamic content or mask them when using the Playwright provider by using the mask option in screenshotOptions.
await expect(page.getByTestId('profile')).toMatchScreenshot({
  screenshotOptions: {
    mask: [page.getByTestId('last-seen')],
  },
})
Disable Animations
Animations can cause flaky tests. Disable them during testing by injecting a custom CSS snippet:
*, *::before, *::after {
  animation-duration: 0s !important;
  animation-delay: 0s !important;
  transition-duration: 0s !important;
  transition-delay: 0s !important;
}
TIP
When using the Playwright provider, animations are automatically disabled when using the assertion: the animations option's value in screenshotOptions is set to "disabled" by default.
Set Appropriate Thresholds
Tuning thresholds is tricky. It depends on the content, test environment, what's acceptable for your app, and might also change based on the test.
Vitest does not set a default for the mismatching pixels, that's up for the user to decide based on their needs. The recommendation is to use allowedMismatchedPixelRatio, so that the threshold is computed on the size of the screenshot and not a fixed number.
When setting both allowedMismatchedPixelRatio and allowedMismatchedPixels, Vitest uses whichever limit is stricter.
Set consistent viewport sizes
As the browser instance might have a different default size, it's best to set a specific viewport size, either on the test or the instance configuration:
await page.viewport(1280, 720)export default defineConfig({
test: {
browser: {
enabled: true,
provider: 'playwright',
instances: [
{
browser: 'chromium',
viewport: { width: 1280, height: 720 },
},
],
},
},
})Use Git LFS
Store reference screenshots in Git LFS if you plan to have a large test suite.
Debugging Failed Tests
When a visual test fails, Vitest provides three images to help debug:
- Reference screenshot: the expected baseline image
- Actual screenshot: what was captured during the test
- Diff image: highlights the differences, but this might not get generated
You'll see something like:
expect(element).toMatchScreenshot()

Screenshot does not match the stored reference.
245 pixels (ratio 0.03) differ.

Reference screenshot:
  tests/__screenshots__/button.test.ts/button-chromium-darwin.png

Actual screenshot:
  tests/.vitest-attachments/button.test.ts/button-chromium-darwin-actual.png

Diff image:
  tests/.vitest-attachments/button.test.ts/button-chromium-darwin-diff.png
Understanding the diff image
- Red pixels are areas that differ between reference and actual
- Yellow pixels are anti-aliasing differences (when anti-alias is not ignored)
- Transparent/original are unchanged areas
TIP
If the diff is mostly red, something's really wrong. If it's speckled with a few red pixels around text, you probably just need to bump your threshold.
Common Issues and Solutions
False Positives from Font Rendering
Font availability and rendering varies significantly between systems. Some possible solutions might be to:
Use web fonts and wait for them to load:
ts// wait for fonts to load await document.fonts.ready // continue with your testsIncrease comparison threshold for text-heavy areas:
tsawait expect(page.getByTestId('article-summary')).toMatchScreenshot({ comparatorName: 'pixelmatch', comparatorOptions: { // 10% of the pixels are allowed to change allowedMismatchedPixelRatio: 0.1, }, })Use a cloud service or containerized environment for consistent font rendering.
Flaky Tests or Different Screenshot Sizes
If tests pass and fail randomly, or if screenshots have different dimensions between runs:
- Wait for everything to load, including loading indicators
- Set explicit viewport sizes:
await page.viewport(1920, 1080) - Check for responsive behavior at viewport boundaries
- Check for unintended animations or transitions
- Increase test timeout for large screenshots
- Use a cloud service or containerized environment
Visual Regression Testing for Teams
Remember when we mentioned visual tests need a stable environment? Well, here's the thing: your local machine isn't it.
For teams, you've basically got three options:
- Self-hosted runners, complex to set up, painful to maintain
- GitHub Actions, free (for open source), works with any provider
- Cloud services, like Microsoft Playwright Testing, built for this exact problem
We'll focus on options 2 and 3 since they're the quickest to get running.
To be upfront, the main trade-offs for each are:
- GitHub Actions: visual tests only run in CI (developers can't run them locally)
- Microsoft's service: works everywhere but costs money and only works with Playwright
The trick here is keeping visual tests separate from your regular tests, otherwise, you'll waste hours checking failing logs of screenshot mismatches.
Organizing Your Tests
First, isolate your visual tests. Stick them in a visual folder (or whatever makes sense for your project):
{
  "scripts": {
    "test:unit": "vitest --exclude tests/visual/*.test.ts",
    "test:visual": "vitest tests/visual/*.test.ts"
  }
}
Now developers can run npm run test:unit locally without visual tests getting in the way. Visual tests stay in CI where the environment is consistent.
Alternative
Not a fan of glob patterns? You could also use separate Test Projects instead and run them using:
vitest --project unitvitest --project visual
CI Setup
Your CI needs browsers installed. How you do this depends on your provider:
Playwright makes this easy. Just pin your version and add this before running tests:
# ...the rest of the workflow
- name: Install Playwright Browsers
  run: npx --no playwright install --with-deps --only-shell
Then run your visual tests:
# ...the rest of the workflow
# ...browser setup
- name: Visual Regression Testing
  run: npm run test:visual
The Update Workflow
Here's where it gets interesting. You don't want to update screenshots on every PR automatically (chaos!). Instead, create a manually-triggered workflow that developers can run when they intentionally change the UI.
The workflow below:
- Only runs on feature branches (never on main)
- Credits the person who triggered it as co-author
- Prevents concurrent runs on the same branch
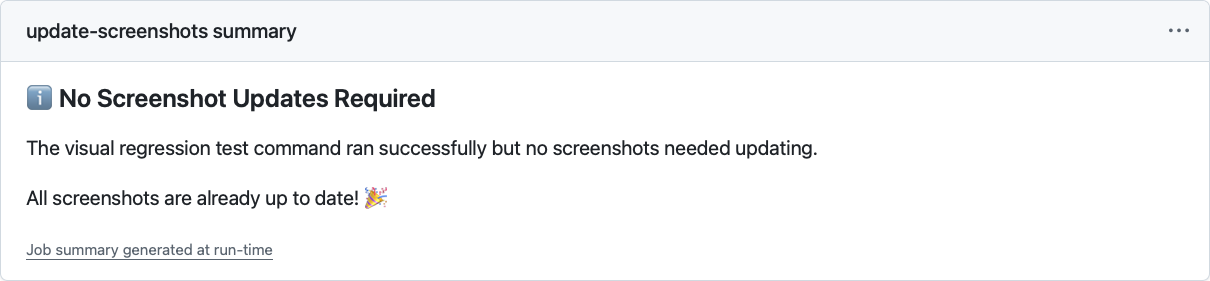
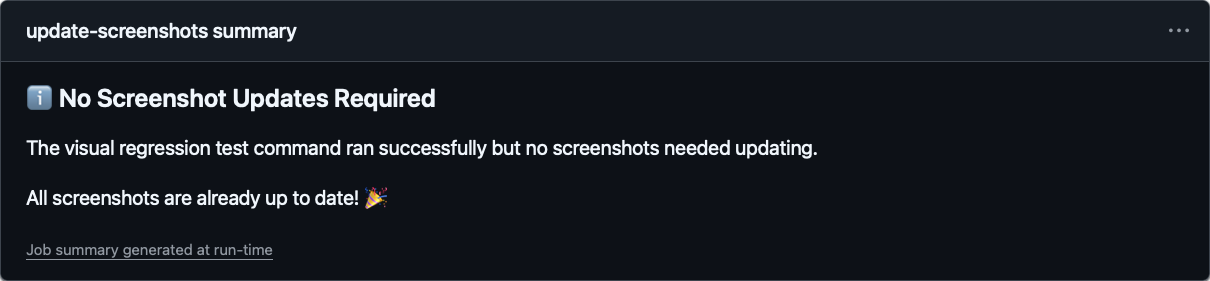
- Shows a nice summary:
When screenshots changed, it lists what changed

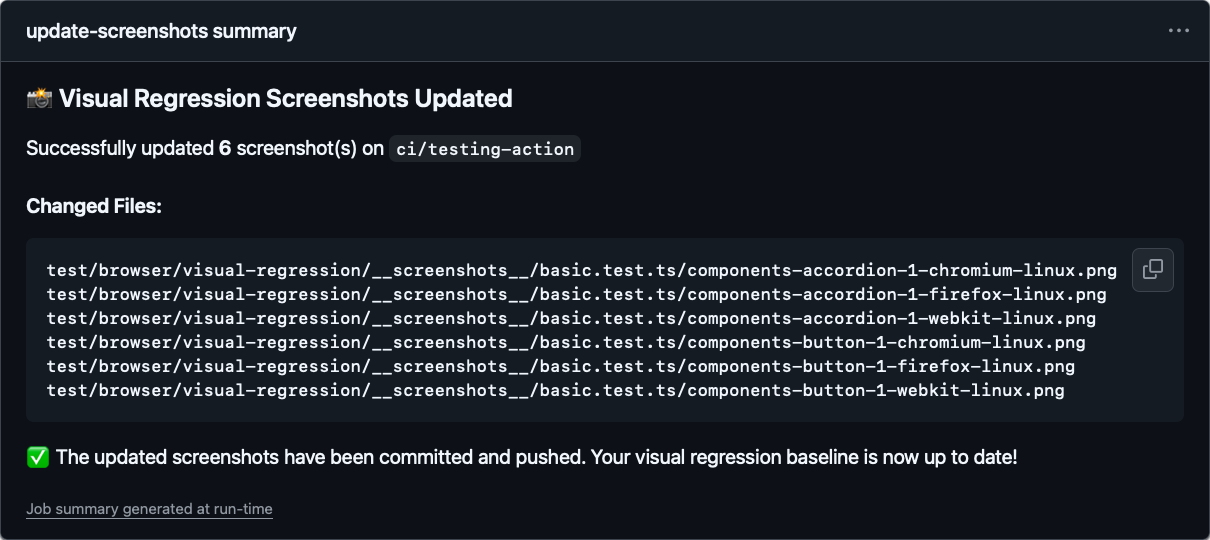
When nothing changed, well, it tells you that too
TIP
This is just one approach. Some teams prefer PR comments (/update-screenshots), others use labels. Adjust it to fit your workflow!
The important part is having a controlled way to update baselines.
name: Update Visual Regression Screenshots

on:
  workflow_dispatch: # manual trigger only

env:
  AUTHOR_NAME: 'github-actions[bot]'
  AUTHOR_EMAIL: '41898282+github-actions[bot]@users.noreply.github.com'
  COMMIT_MESSAGE: |
    test: update visual regression screenshots

    Co-authored-by: ${{ github.actor }} <${{ github.actor_id }}+${{ github.actor }}@users.noreply.github.com>

jobs:
  update-screenshots:
    runs-on: ubuntu-24.04

    # safety first: don't run on main
    if: github.ref_name != github.event.repository.default_branch

    # one at a time per branch
    concurrency:
      group: visual-regression-screenshots@${{ github.ref_name }}
      cancel-in-progress: true

    permissions:
      contents: write # needs to push changes

    steps:
      - name: Checkout selected branch
        uses: actions/checkout@v4
        with:
          ref: ${{ github.ref_name }}
          # use PAT if triggering other workflows
          # token: ${{ secrets.GITHUB_TOKEN }}

      - name: Configure Git
        run: |
          git config --global user.name "${{ env.AUTHOR_NAME }}"
          git config --global user.email "${{ env.AUTHOR_EMAIL }}"

      # your setup steps here (node, pnpm, whatever)
      - name: Setup Node.js
        uses: actions/setup-node@v4
        with:
          node-version: 24

      - name: Install dependencies
        run: npm ci

      - name: Install Playwright Browsers
        run: npx --no playwright install --with-deps --only-shell

      # the magic happens below 🪄
      - name: Update Visual Regression Screenshots
        run: npm run test:visual --update

      # check what changed
      - name: Check for changes
        id: check_changes
        run: |
          CHANGED_FILES=$(git status --porcelain | awk '{print $2}')
          if [ "${CHANGED_FILES:+x}" ]; then
            echo "changes=true" >> $GITHUB_OUTPUT
            echo "Changes detected"

            # save the list for the summary
            echo "changed_files<<EOF" >> $GITHUB_OUTPUT
            echo "$CHANGED_FILES" >> $GITHUB_OUTPUT
            echo "EOF" >> $GITHUB_OUTPUT
            echo "changed_count=$(echo "$CHANGED_FILES" | wc -l)" >> $GITHUB_OUTPUT
          else
            echo "changes=false" >> $GITHUB_OUTPUT
            echo "No changes detected"
          fi

      # commit if there are changes
      - name: Commit changes
        if: steps.check_changes.outputs.changes == 'true'
        run: |
          git add -A
          git commit -m "${{ env.COMMIT_MESSAGE }}"

      - name: Push changes
        if: steps.check_changes.outputs.changes == 'true'
        run: git push origin ${{ github.ref_name }}

      # pretty summary for humans
      - name: Summary
        run: |
          if [[ "${{ steps.check_changes.outputs.changes }}" == "true" ]]; then
            echo "### 📸 Visual Regression Screenshots Updated" >> $GITHUB_STEP_SUMMARY
            echo "" >> $GITHUB_STEP_SUMMARY
            echo "Successfully updated **${{ steps.check_changes.outputs.changed_count }}** screenshot(s) on \`${{ github.ref_name }}\`" >> $GITHUB_STEP_SUMMARY
            echo "" >> $GITHUB_STEP_SUMMARY
            echo "#### Changed Files:" >> $GITHUB_STEP_SUMMARY
            echo "\`\`\`" >> $GITHUB_STEP_SUMMARY
            echo "${{ steps.check_changes.outputs.changed_files }}" >> $GITHUB_STEP_SUMMARY
            echo "\`\`\`" >> $GITHUB_STEP_SUMMARY
            echo "" >> $GITHUB_STEP_SUMMARY
            echo "✅ The updated screenshots have been committed and pushed. Your visual regression baseline is now up to date!" >> $GITHUB_STEP_SUMMARY
          else
            echo "### ℹ️ No Screenshot Updates Required" >> $GITHUB_STEP_SUMMARY
            echo "" >> $GITHUB_STEP_SUMMARY
            echo "The visual regression test command ran successfully but no screenshots needed updating." >> $GITHUB_STEP_SUMMARY
            echo "" >> $GITHUB_STEP_SUMMARY
            echo "All screenshots are already up to date! 🎉" >> $GITHUB_STEP_SUMMARY
          fi
So Which One?
Both approaches work. The real question is what pain points matter most to your team.
If you're already deep in the GitHub ecosystem, GitHub Actions is hard to beat. Free for open source, works with any browser provider, and you control everything.
The downside? That "works on my machine" conversation when someone generates screenshots locally and they don't match CI expectations anymore.
The cloud service makes sense if developers need to run visual tests locally.
Some teams have designers checking their work or developers who prefer catching issues before pushing. It allows skipping the push-wait-check-fix-push cycle.
Still on the fence? Start with GitHub Actions. You can always add the cloud service later if local testing becomes a pain point.